

How Flexible Packaging Is Printed: Printing Methods, Equipment and Quality Control
Flexible packaging printing transfers artwork, branding and product information onto packaging films using technologies such as gravure, digital and flexographic printing. The printed film is then laminated when the structure requires it and converted into finished pouches. BioPouches offers all three printing methods at its production facility in China, and I have seen the printing and inspection stages in person.
This article explains how each method works, where each one fits, what happens to the film after printing, and how printed film is inspected. Where I describe something I saw at the BioPouches factory, I say so. Where I explain general printing principles, I keep that separate, so you can tell observation from background.
Inside the BioPouches Printing Facility
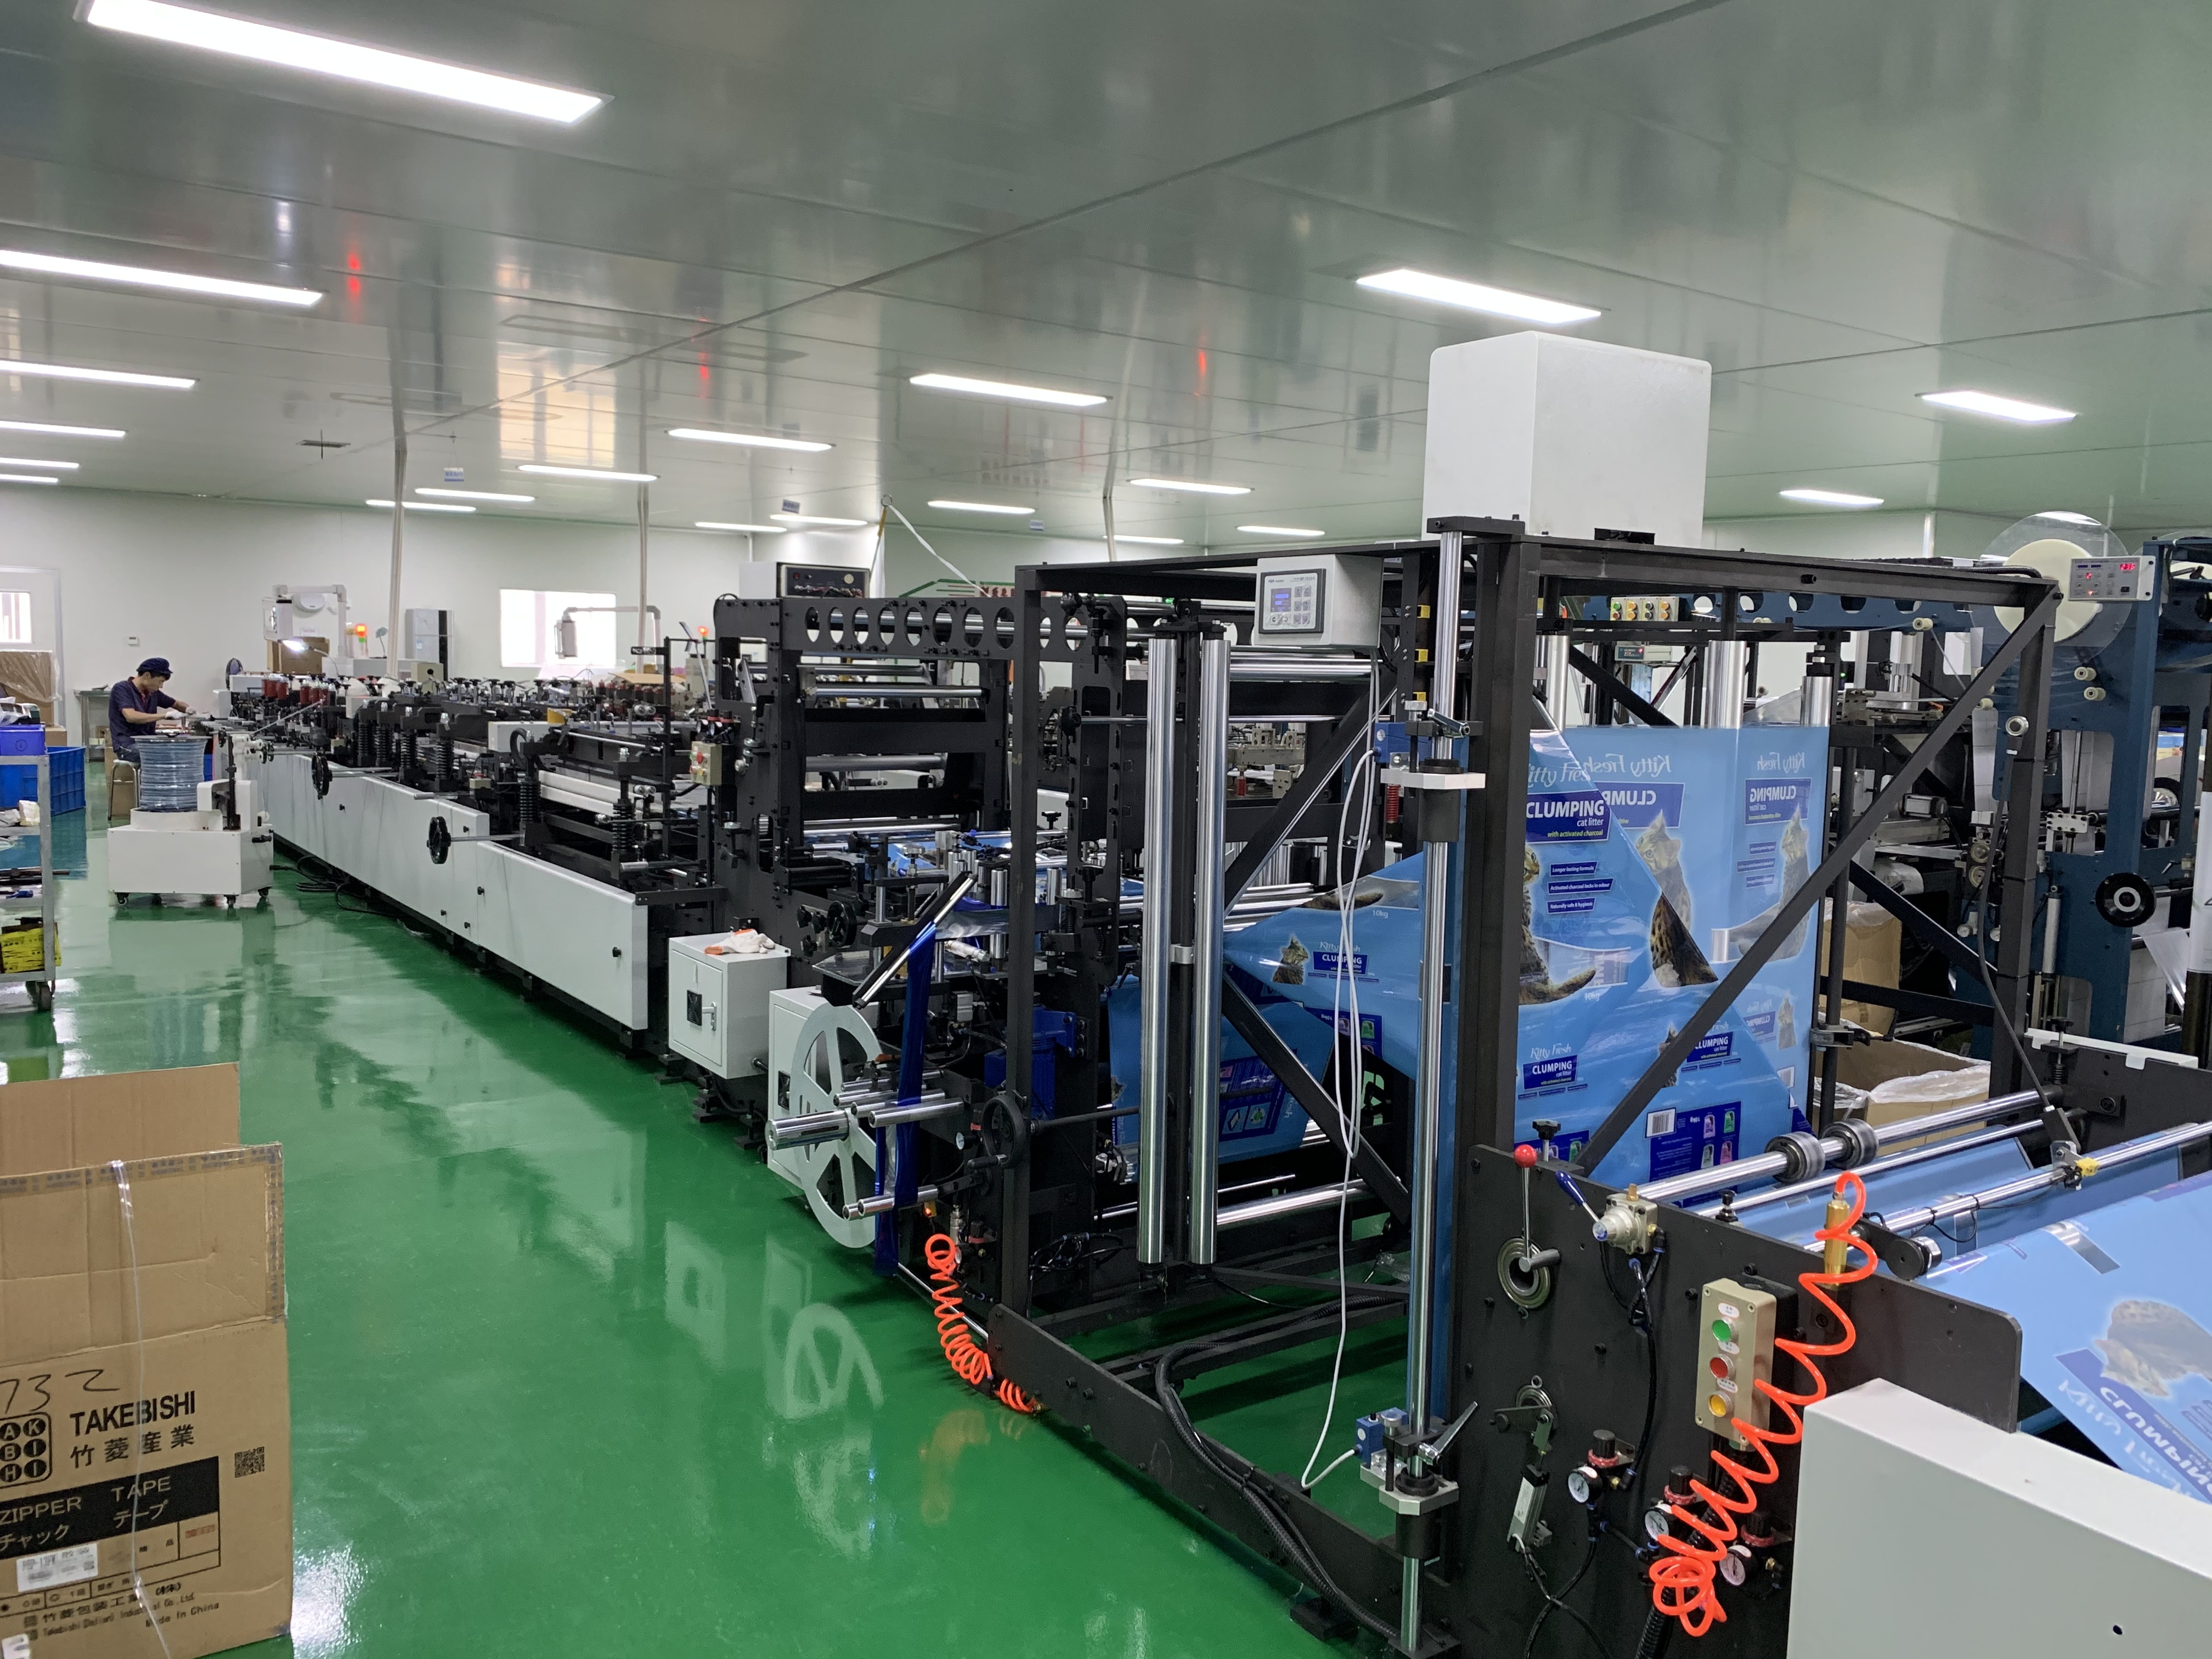
During my visit to the BioPouches production facility, the first thing I noticed was how controlled the entry is. Visitors entering the production area wear disposable blue shoe covers and head covers, and the entry passes through an air-shower room. Inside, the factory is divided into designated areas for printing, lamination, pouch converting, inspection, testing and packing.
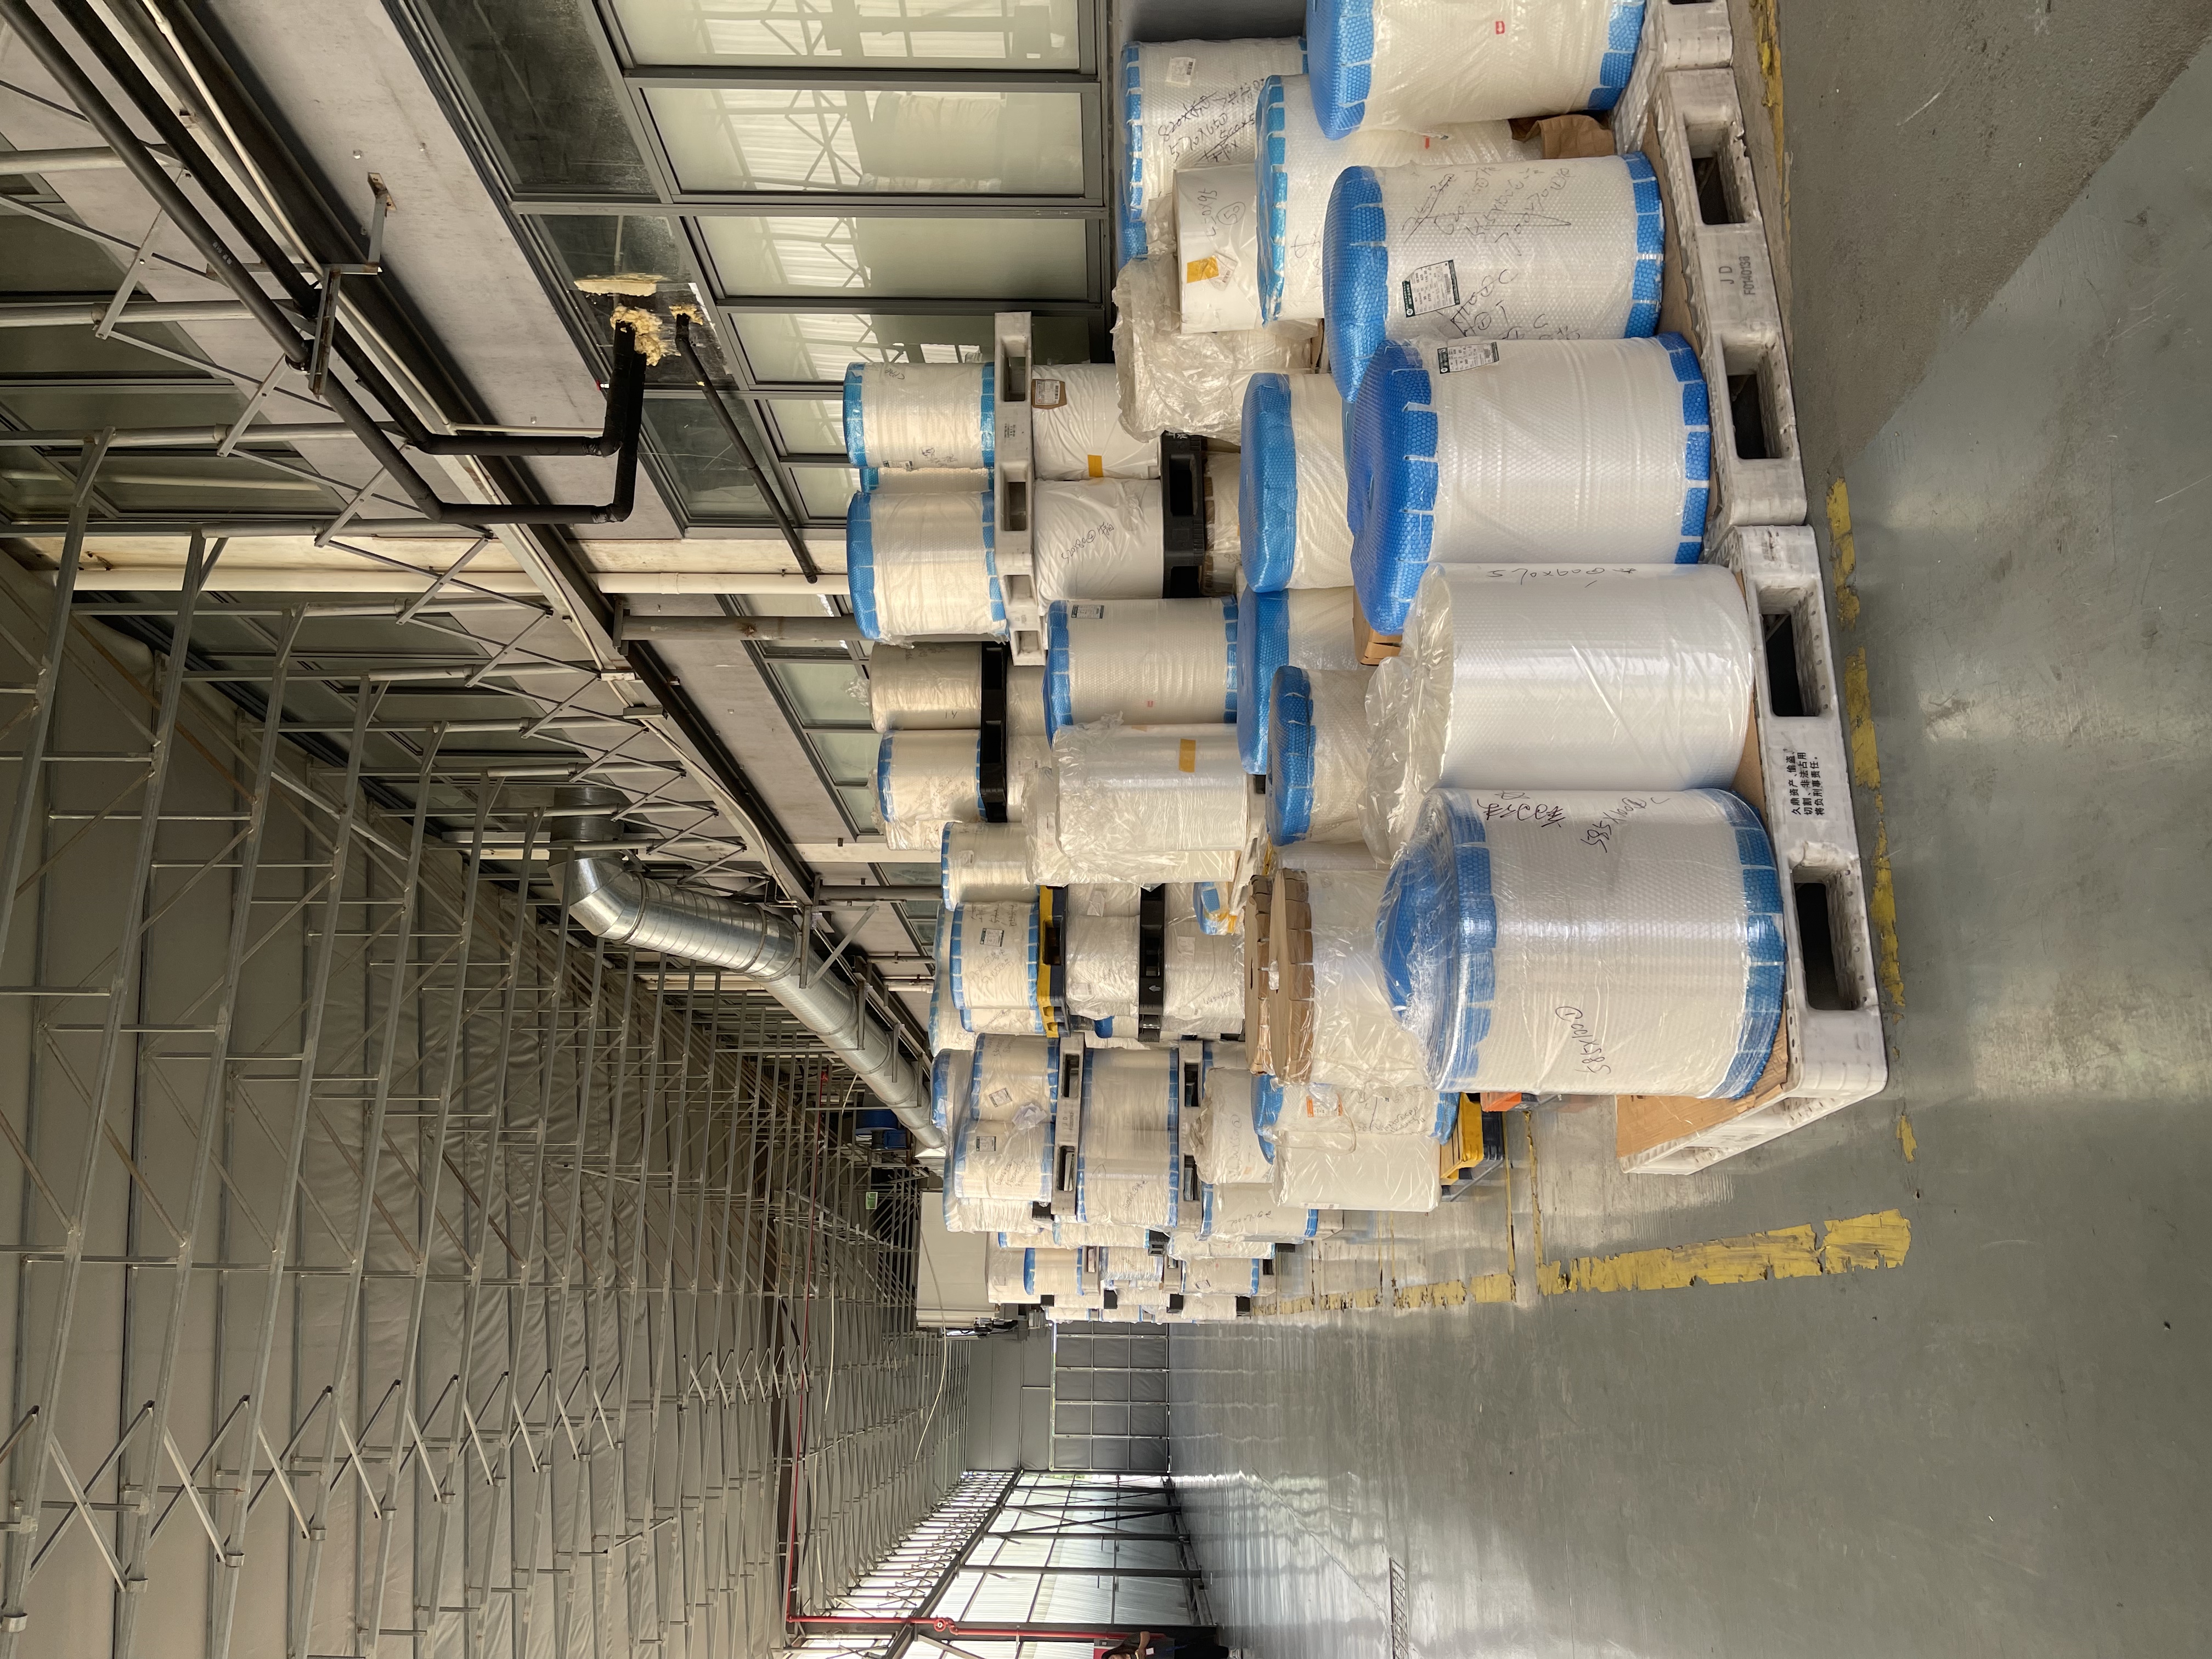
Everything starts with rolls of packaging film. Which film a project uses depends on the pouch structure and the product, and I am not going to guess at material specifications from a photograph.
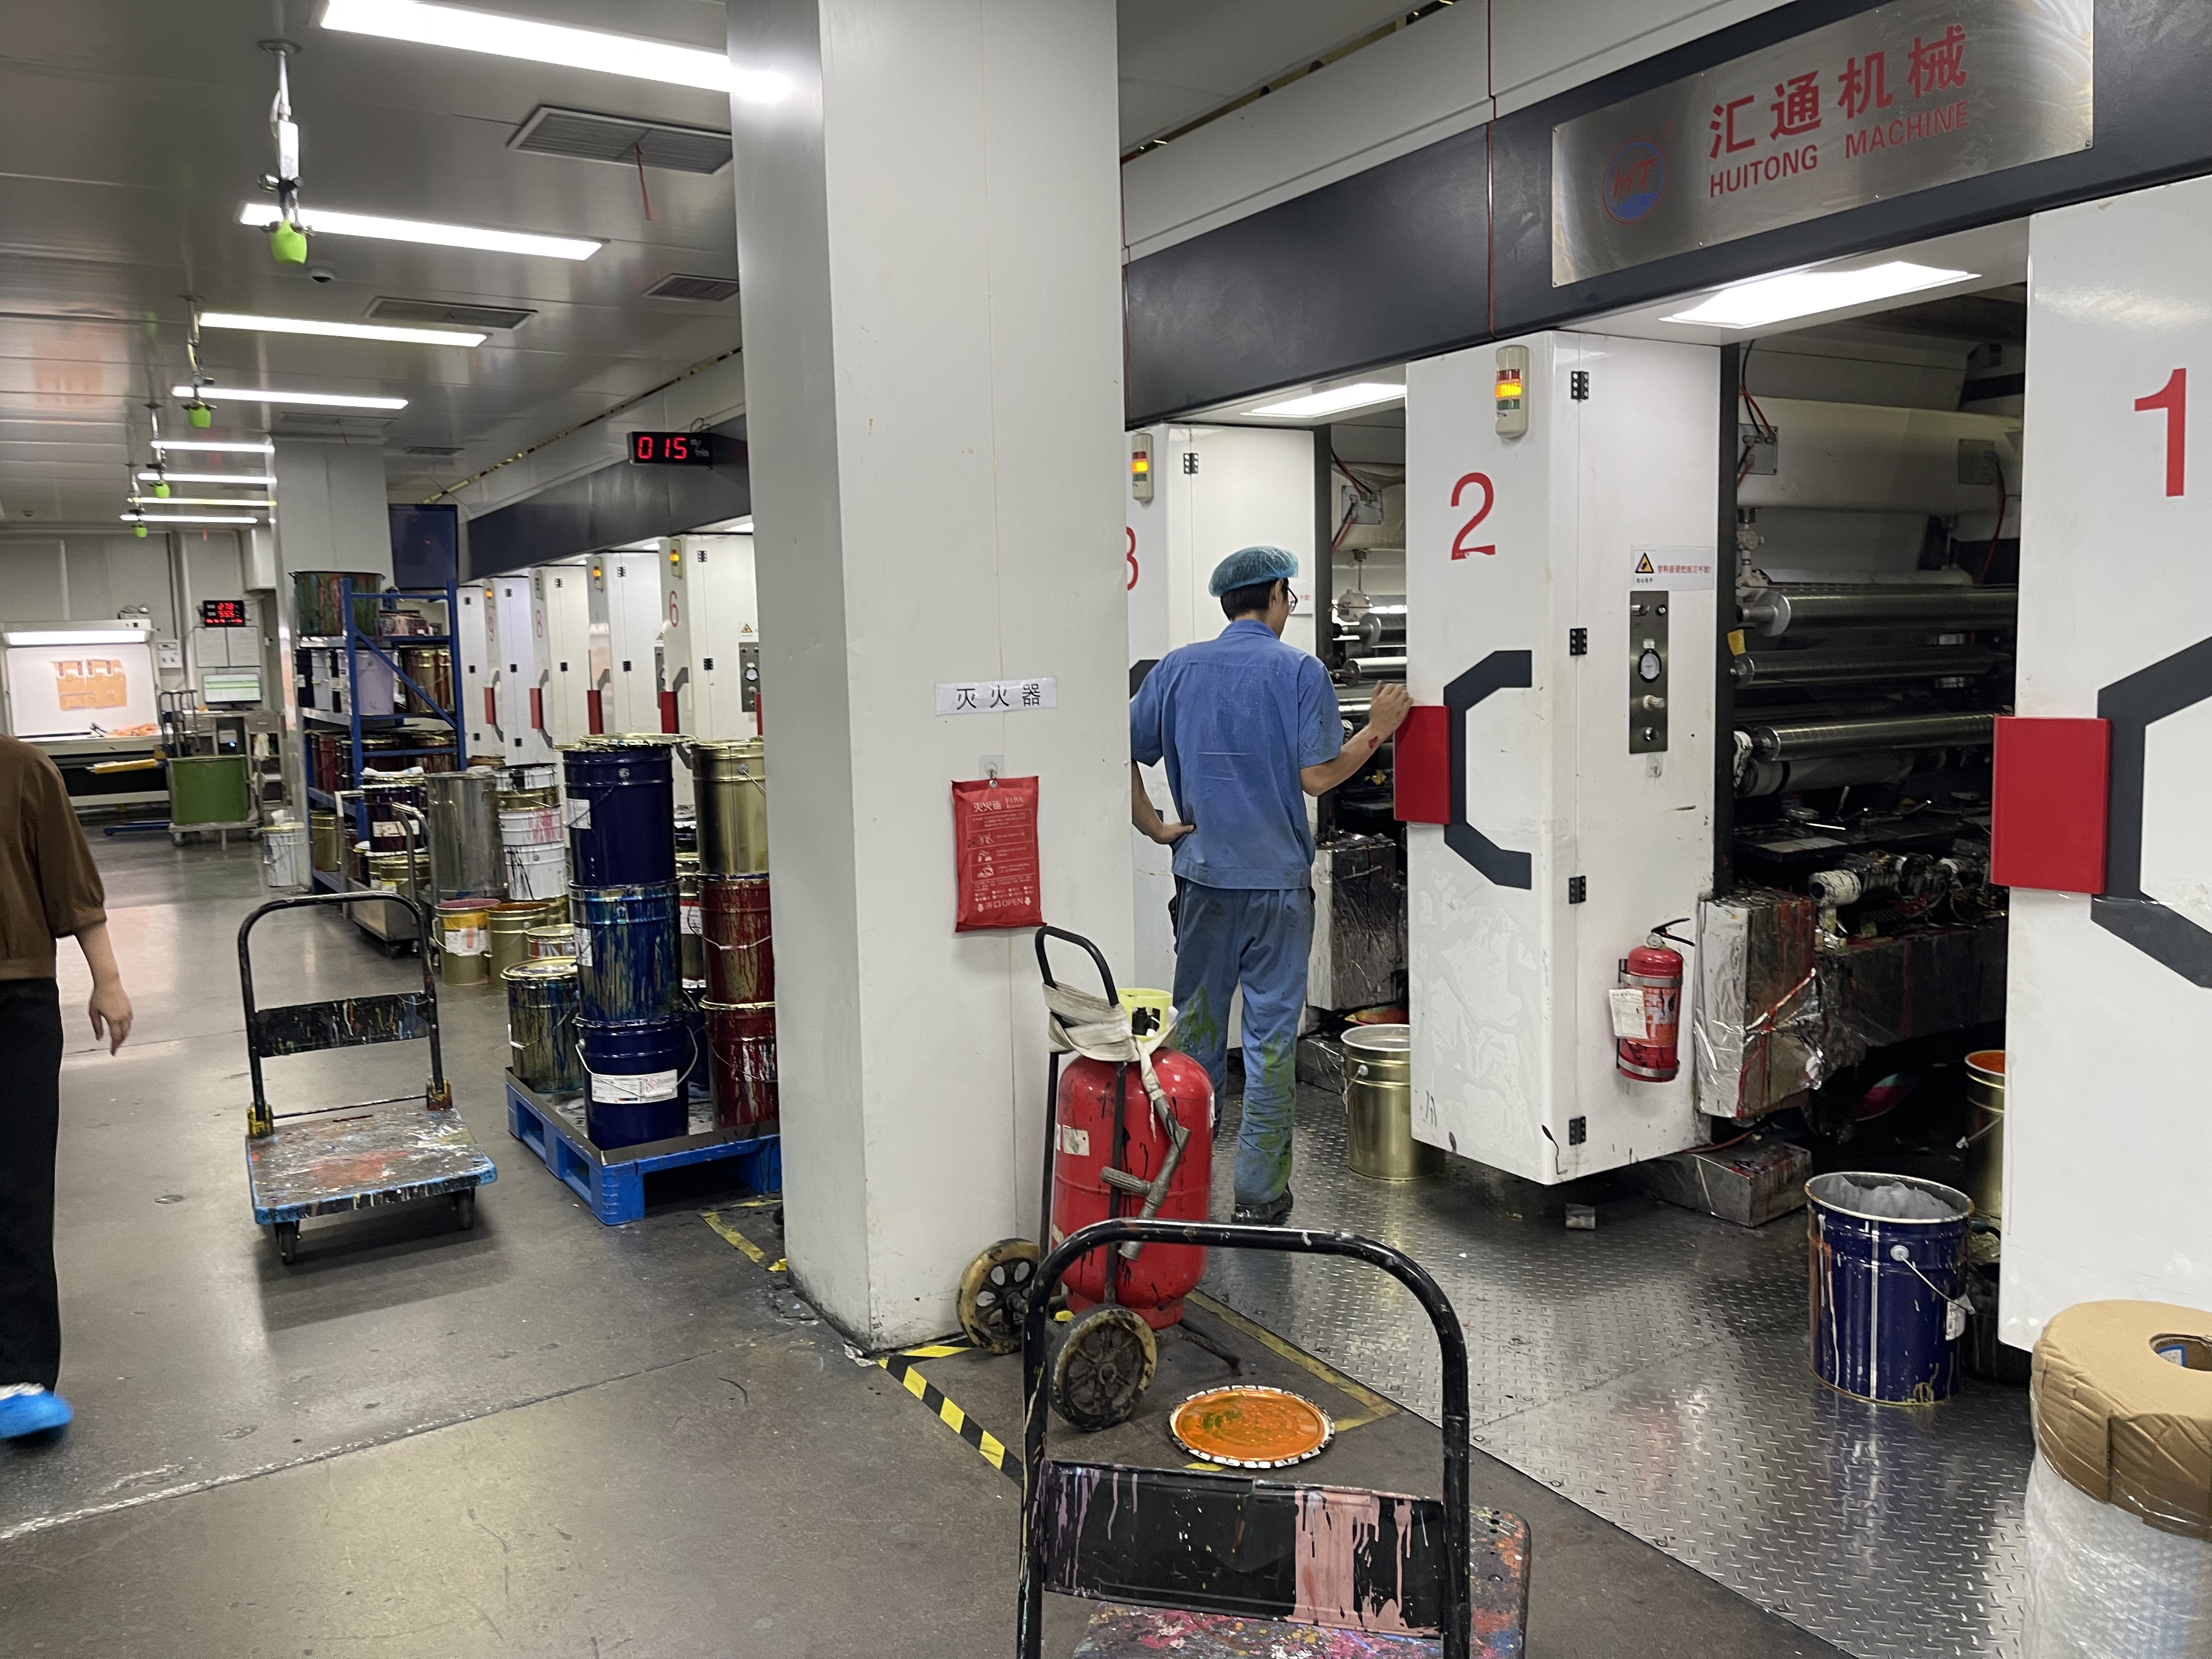
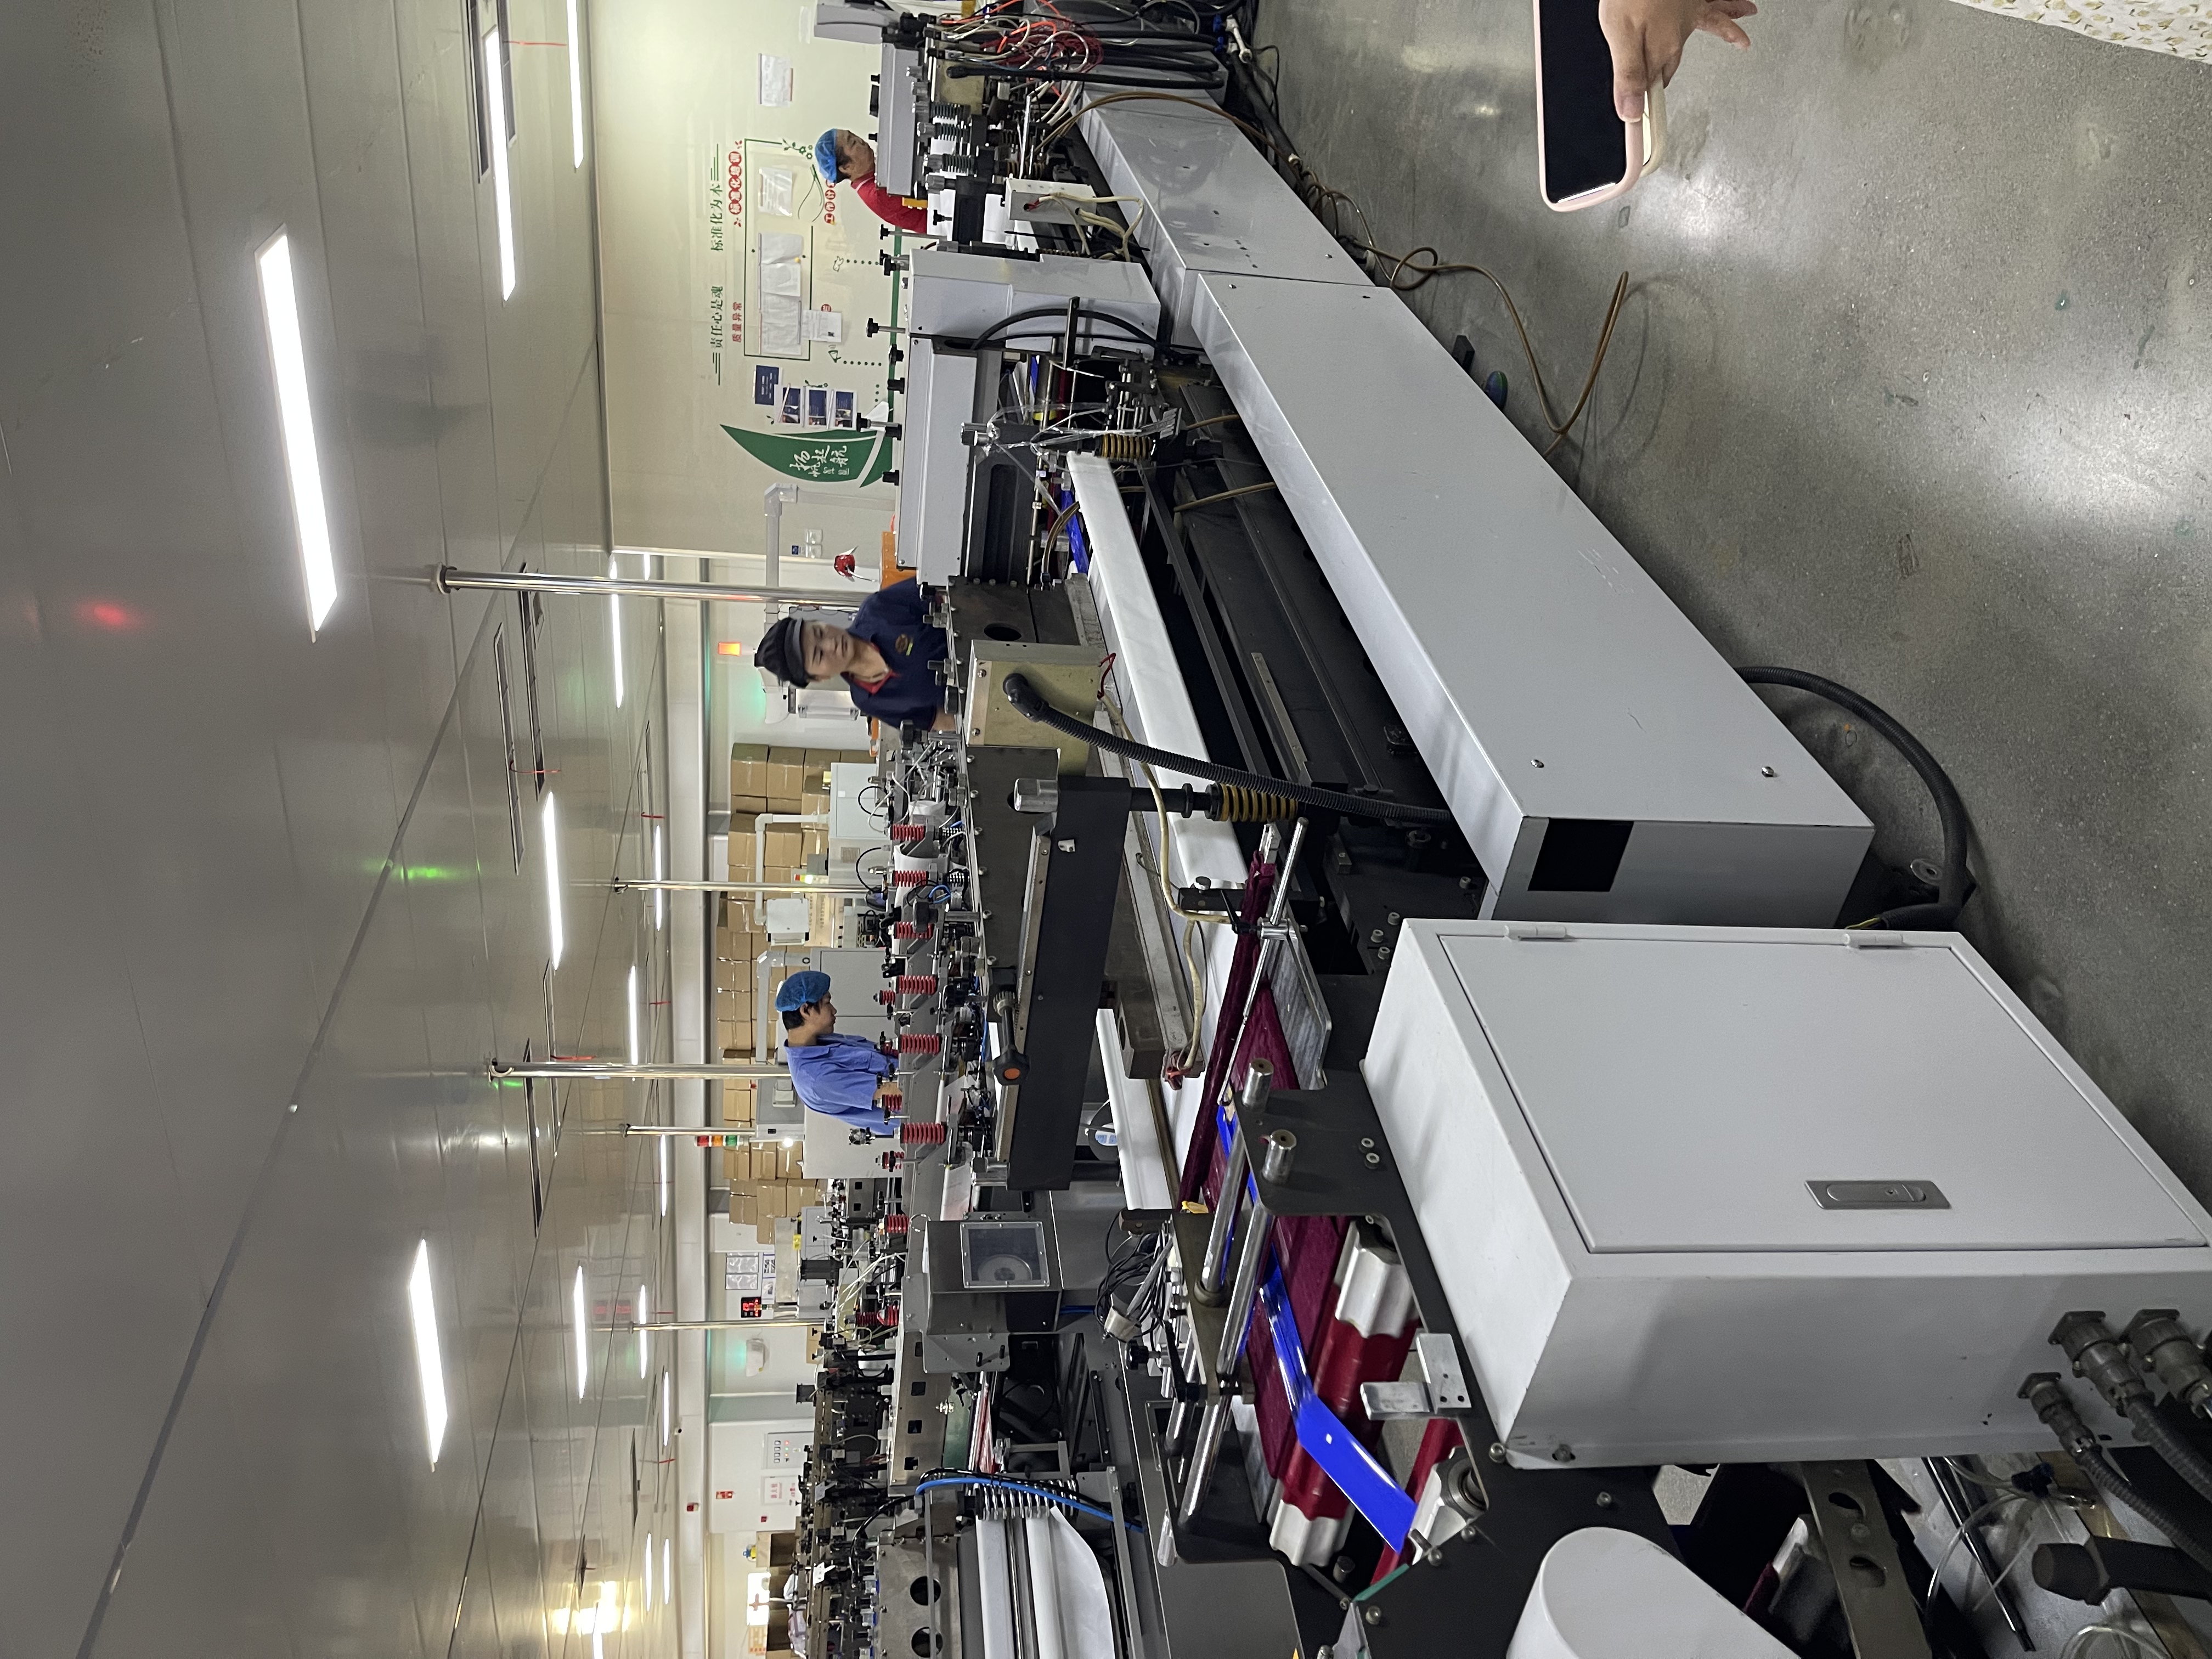
BioPouches has printing equipment covering 1 to 10 colors. During the visit I watched a 10-color gravure press running. The film travelled through numbered printing stations, one for each color, and was collected into rolls once it had passed through the press.
What stayed with me was how methodical it is. Each station adds one color, so by the end of the press the film carries the full design. The printed rolls then go on to inspection, which I describe further down.
Testing and Sealing Equipment in the Factory
Away from the press, the factory also has equipment for evaluating materials and seals. Photographs from the facility show an electronic tensile tester, a heat-seal testing instrument, a coefficient of friction tester, a laboratory temperature-controlled oven, a whiteness meter, a seal-integrity or leak-testing instrument and continuous band sealing machines.
These belong to broader material evaluation, sealing and quality-control work, not specifically to checking print. I am listing them to show what is in the building. I am not publishing test methods, standards or acceptance limits, because those details were not supplied for this article. You can see more original production photographs in the BioPouches factory photo gallery, which covers printing, raw materials, lamination, pouch forming, sealing, degassing valves, testing laboratories, inspection, packing and shipping.
How Does the Flexible Packaging Printing Process Work?
Printing a flexible package is a sequence of stages, not one operation. The list below follows the general process. Stages marked Observed are ones I saw at the BioPouches factory. The others are general explanations of how printing works.
Packaging design and artwork preparation. The design is built to the pouch dimensions, including the areas where seals, zippers or valves will sit, so important artwork is not hidden or cut.
Prepress and color preparation. Artwork is prepared for the chosen printing method and separated into the colors the press will lay down. Color references such as Pantone numbers are confirmed here.
Film material selection. The film is chosen for the structure, the barrier needs and the print surface. Observed: raw film rolls at the facility.
Printing setup. Depending on the method, setup means preparing cylinders or plates, or loading digital files, then mounting, adjusting film tension and checking registration.
Ink transfer and drying. Ink is applied to the film and dried before the film is wound. Observed: ink transfer on the 10-color gravure press.
Printed film collection. The printed film is wound into rolls. Observed.
Printed film inspection. The rolls are checked for print and film defects. Observed.
Lamination and subsequent converting, where required. Printed film can be laminated to additional layers, including aluminum-containing structures where specified, then folded, sealed and cut into pouches. Observed.
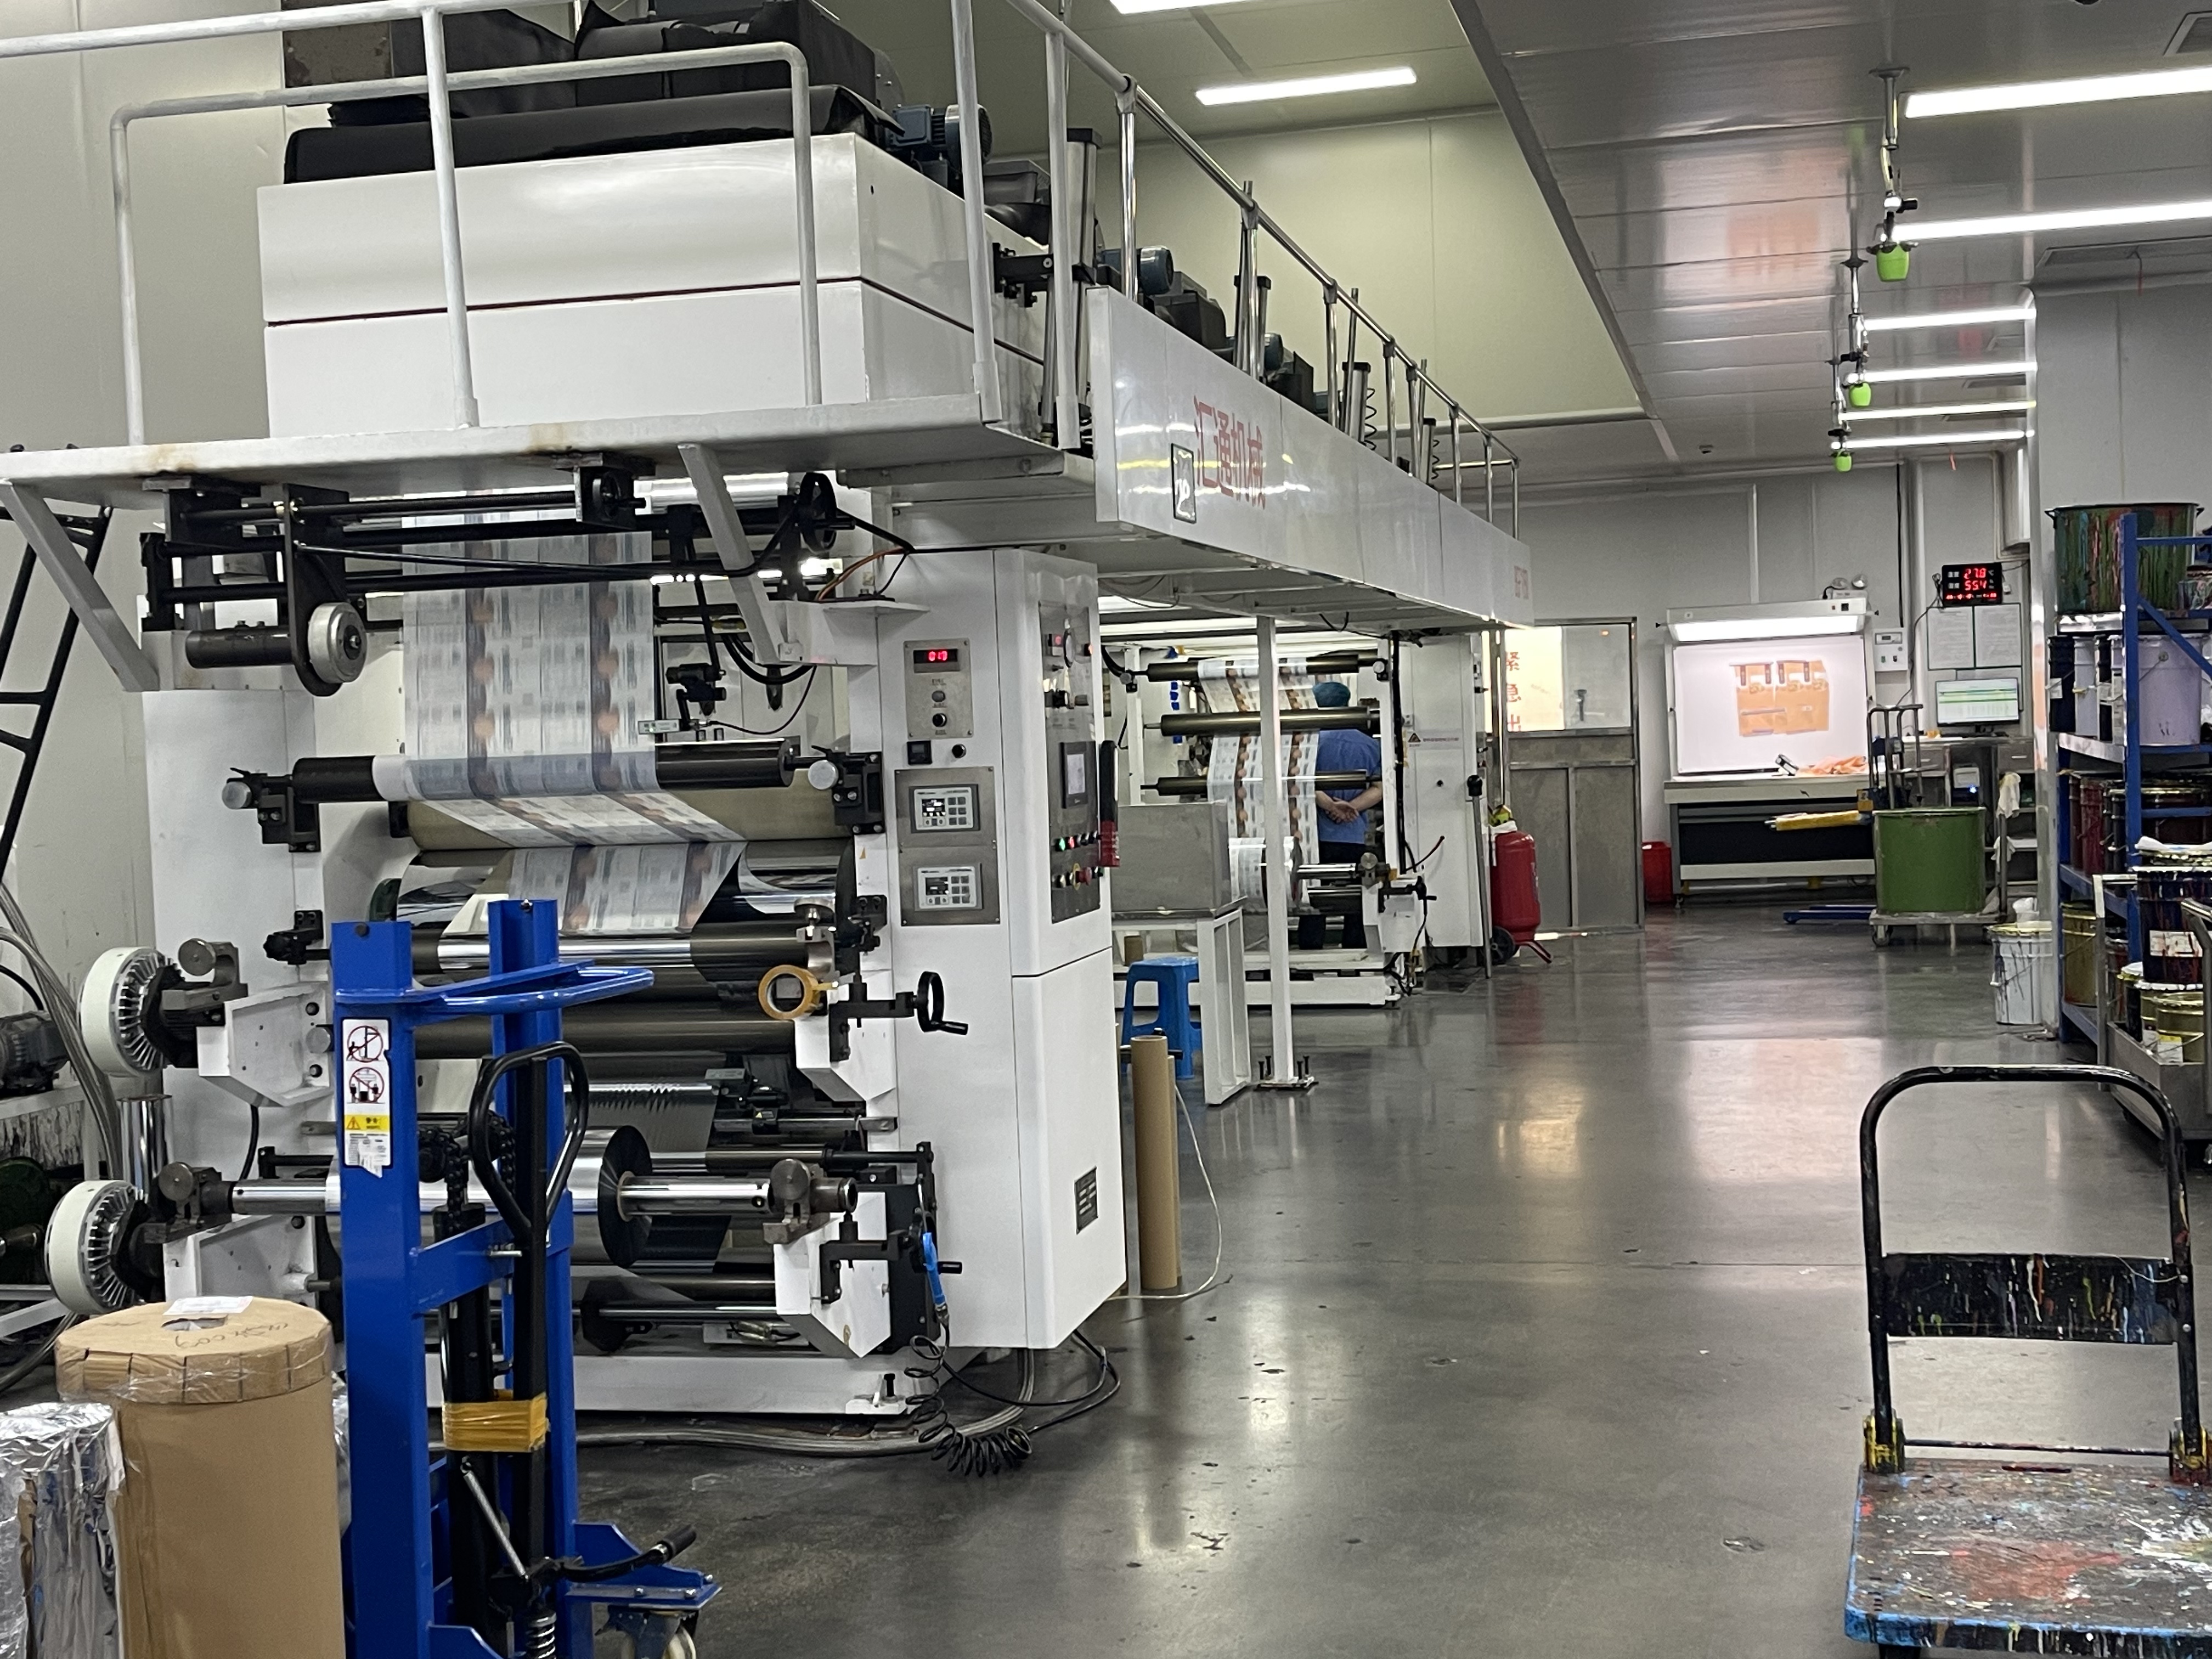
Lamination is why the printing method, the ink and the later steps all have to work together. Lamination, slitting and cutting, pouch forming and sealing, and finished-pouch quality control each deserve their own detailed guide, and those are topics we plan to cover separately. This article stays with printing.
Gravure Printing for Flexible Packaging
Gravure printing uses engraved cylinders. The image is cut into the surface of each cylinder as tiny cells. The cylinder turns through ink, a doctor blade wipes the excess from the surface, and the ink left in the cells transfers to the film as it passes between the cylinder and an impression roll. A multicolor design uses one cylinder per color, which is why the 10-color press I saw had numbered stations.
Gravure is typically suited to repeat designs and larger production runs. Once the cylinders exist, the press can produce consistent print from one roll to the next, which matters when a coffee roaster or pet food brand wants every bag on a shelf to match. Multicolor registration, the alignment of each color to the others, is part of what the press setup has to get right.
The trade-off is preparation. Cylinders have to be engraved for each design, which adds cost and lead time before the first pouch, and a design change generally means new cylinders.
Strengths: consistent print across long runs, good handling of detailed artwork.
Limitations: cylinder preparation cost, setup effort, and less practicality for short runs or frequent design changes.
The press I observed at BioPouches is a gravure press, so this is the process that was running in front of me: film moving through numbered stations, each laying down one color.
Digital Printing for Custom Flexible Packaging
Digital printing applies the image directly from a digital file, without conventional image cylinders or plates. That removes much of the preparation gravure and flexographic printing need, which is why digital printing is the practical choice for shorter runs.
It suits product launches, packaging tests, brands with several flavors or sizes, and artwork that is still changing. Revising a design means editing a file, not remaking cylinders or plates, and several designs can be handled within an order more readily than on a plate-based method.
Digital printing has limits too. The cost per pouch can be higher than gravure at larger volumes, because the savings on setup come with a different cost structure. Matching a specific brand color can differ from what a conventional press produces, depending on the press and the artwork, and the structures and finishes available can vary by method. BioPouches offers digital printing. I am not going to name a press model or claim proprietary technology, because that is not something I can state accurately.
If you are evaluating digital printing for your packaging, these checks are worth making:
Ask for a printed sample, not just a digital proof.
Compare the sample color against your brand reference.
Check how the print behaves on your actual film and structure.
Confirm that the design you approve is the design that goes into production.
Flexographic Printing for Flexible Packaging
Flexographic printing uses flexible relief plates, with the image raised on the plate. An anilox roll, a roller covered in tiny cells that meters how much ink is carried, feeds ink to the plate, and the plate transfers it to the film. Like gravure, a multicolor design uses one plate and one station per color.
Flexography is widely used for flexible packaging and suits longer runs of settled designs. Setup involves plate making, mounting and registration, so it asks for a quantity that justifies that preparation. Plates are often less costly to prepare than engraved cylinders, although that varies with the job.
Against gravure, flexography can be more demanding for very fine detail or smooth gradients, depending on the job and the press. Against digital, it needs more setup and a longer run to make sense. BioPouches offers flexographic printing. I do not have a photograph of a flexographic press to show here, and the press in the images above is the gravure press.
Gravure vs Digital vs Flexographic Printing
No method is always cheaper, faster or better in quality. Cost and suitability depend on quantity, artwork, material, specifications and production setup. The table compares the general characteristics of each.
| Printing technology | Image carrier or process | Setup requirements | Suitable order characteristics | Design flexibility | Typical advantages | Limitations |
|---|---|---|---|---|---|---|
| Gravure | Engraved cylinders, one per color | Cylinder engraving, press setup, registration | Larger runs, repeat designs | Lower; a design change generally means new cylinders | Consistent print over long runs, detailed artwork | Cylinder cost and lead time; less practical for short runs |
| Digital | Image applied directly from a digital file, no conventional cylinders or plates | File preparation and press setup, little physical tooling | Shorter runs, launches, tests, multiple designs | High; revisions are file changes | Practical for small quantities, easy design changes | Cost per pouch can be higher at large volumes; color matching and structure options vary by press |
| Flexographic | Flexible relief plates, ink metered by an anilox roll | Plate making, mounting, press setup, registration | Longer runs of settled designs | Moderate; plates can be remade for changes | Suited to longer runs; plates are often less costly than cylinders, depending on the job | Setup still needed, so short runs are less economical; fine detail depends on job and press |
Printing Inks and Color Quality
Ink has to do three jobs at once: reproduce the color you approved, stay on the film, and survive what happens after printing. Ink selection depends on the packaging substrate, the printing method and how the finished pouch will be used.
Soy-based inks are among the ink options at BioPouches. That does not mean every order uses soy ink, and it does not make a pouch biodegradable, recyclable or food-safe on its own. Those properties depend on the whole material structure, not on one ink choice. BioPouches emphasizes suitable ink quality, printing performance and the requirements of the packaging application.
Four things decide whether the color and print hold up:
Adhesion. The ink has to bond to the film surface. Poor adhesion shows up as rub-off or flaking.
Color consistency and approval. Brand colors are usually specified with Pantone references and confirmed on an approval sample before production. Color can drift during a long run, which is one reason inspection continues throughout.
Registration accuracy. Every color has to line up with the others, or small text and fine detail blur.
Printing and lamination compatibility. In many laminated structures the print sits between layers, so the ink has to be compatible with the adhesive and the other materials it will meet.
For food and pet food packaging, ink suitability has to be evaluated against the full material structure and the intended application, including where the ink sits relative to the product. I am not publishing ink brands, formulations or certifications here, because I was not given that detail. It is a conversation to have about your specific project.
How BioPouches Inspects Printed Packaging Film
Printed film inspection is a confirmed part of the BioPouches production workflow. After the press, printed film is collected into rolls, and I saw those printed rolls being inspected as part of the workflow.
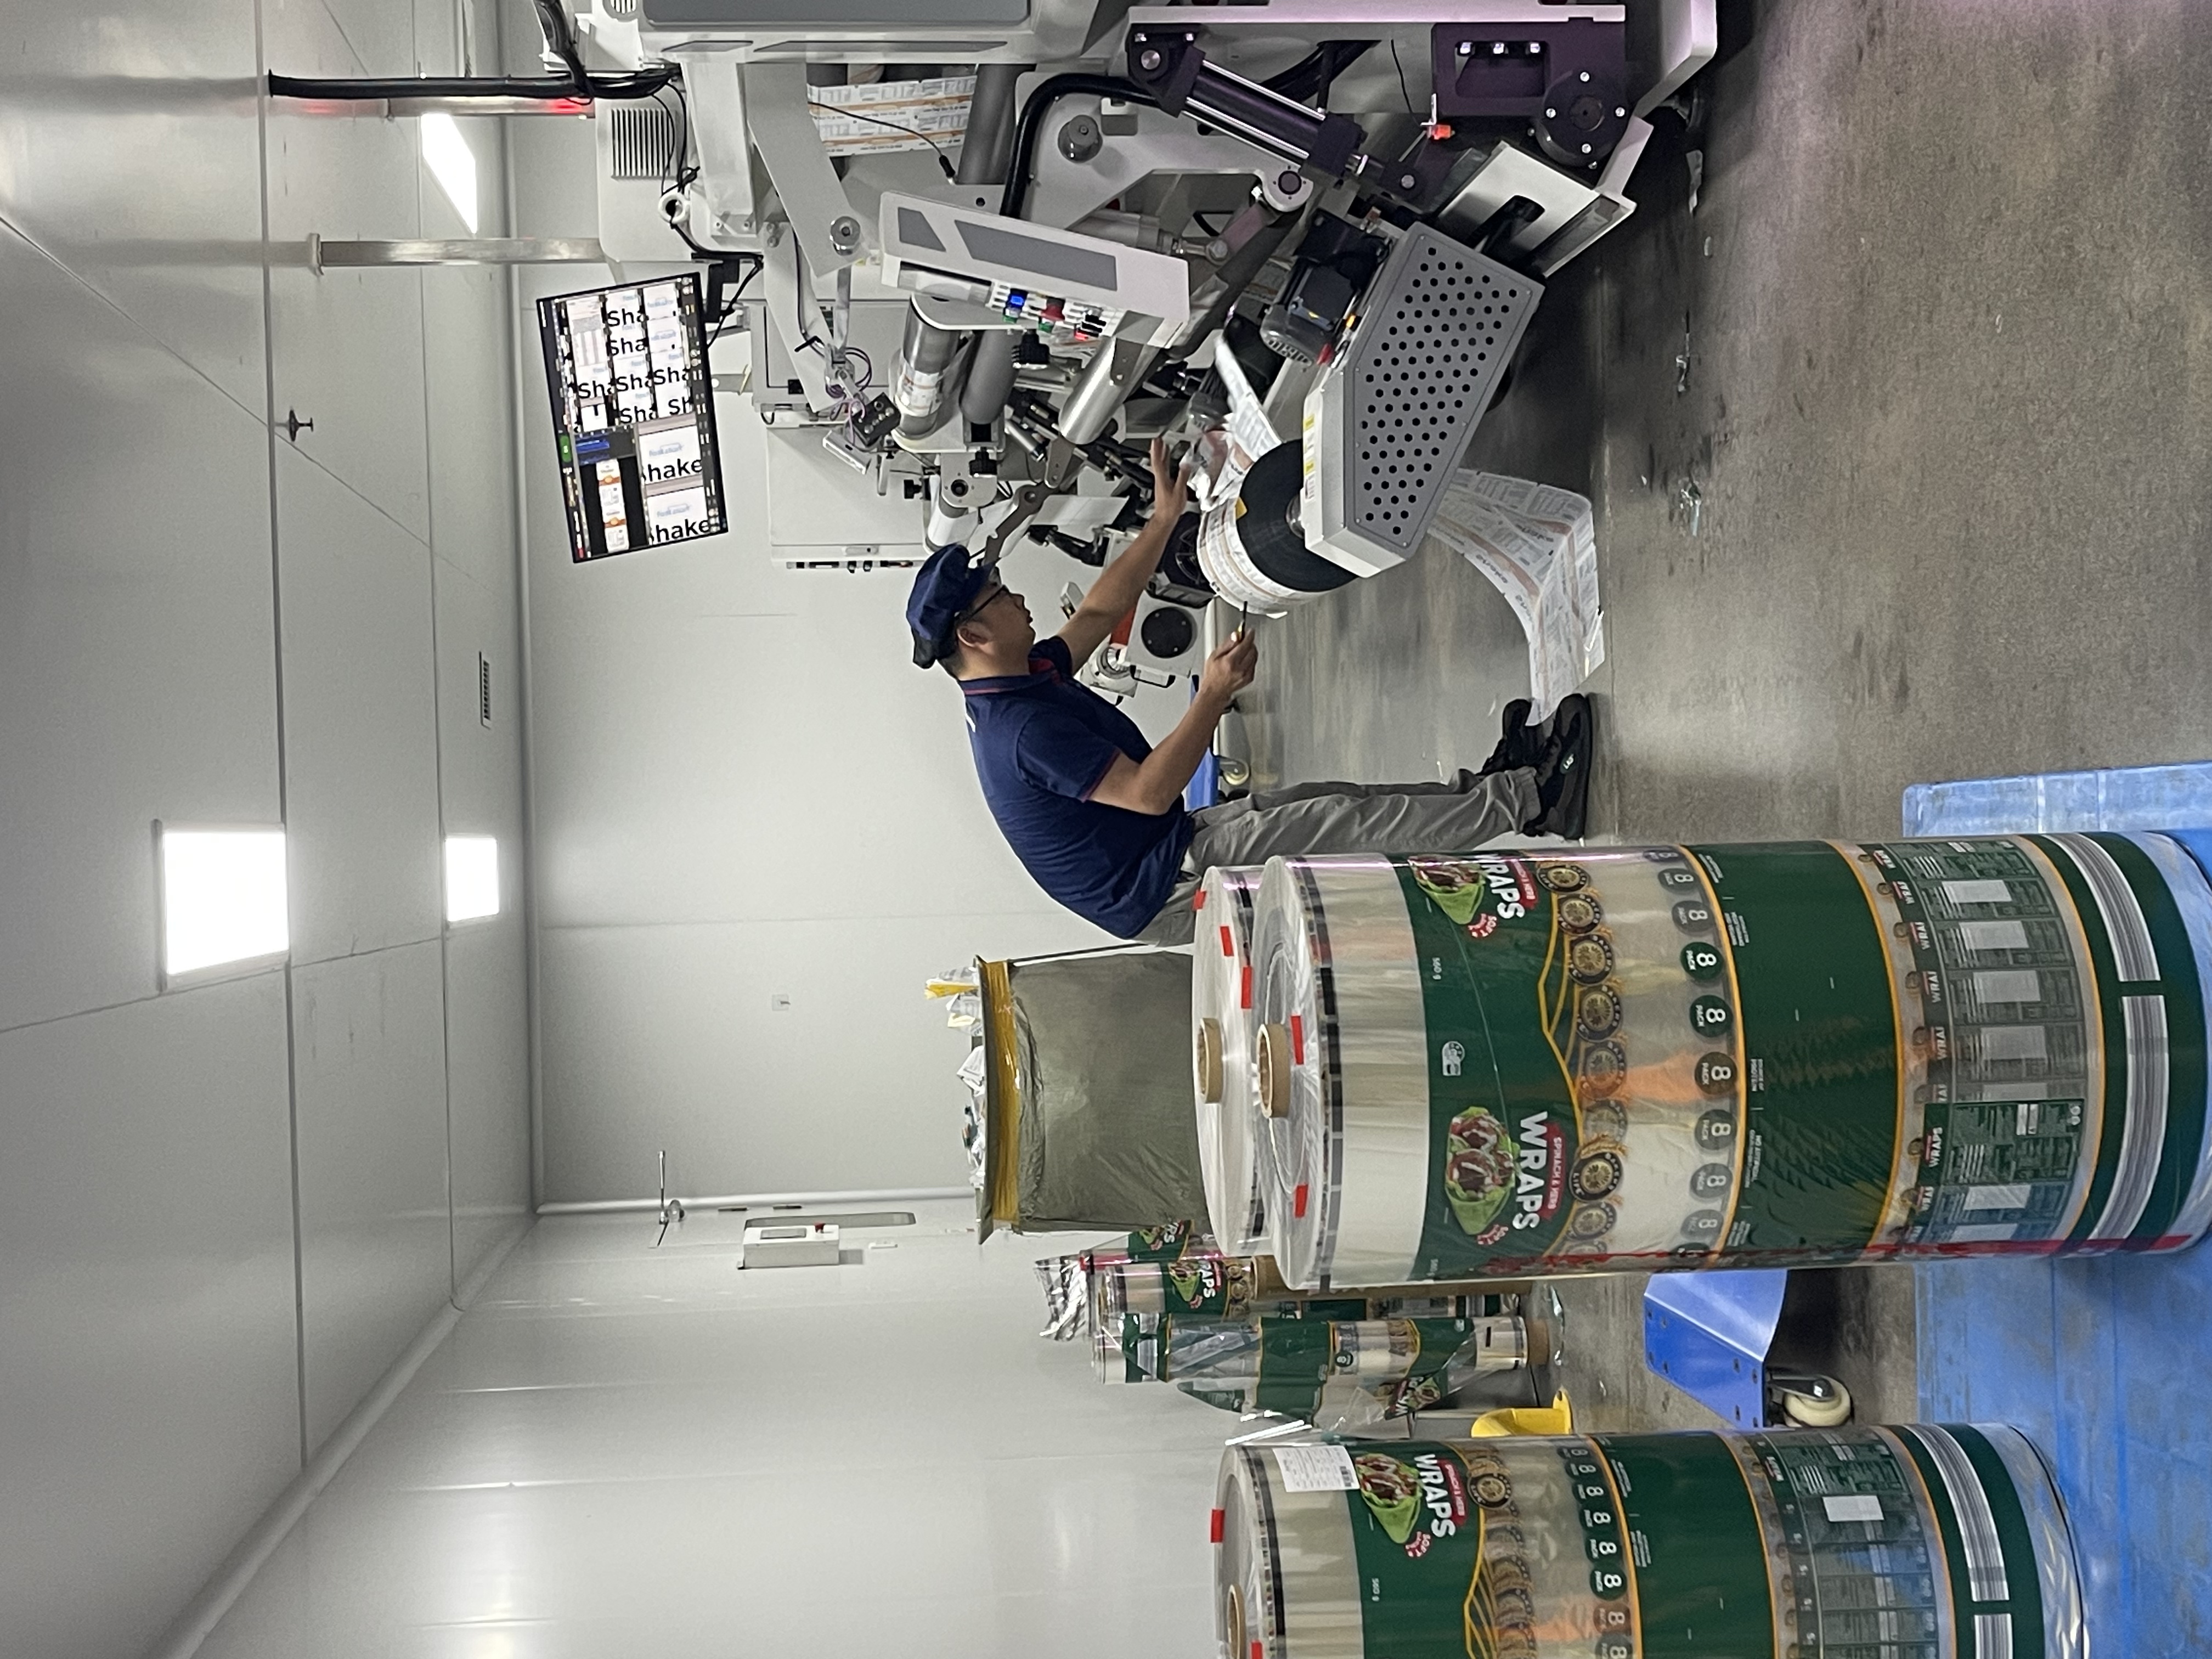
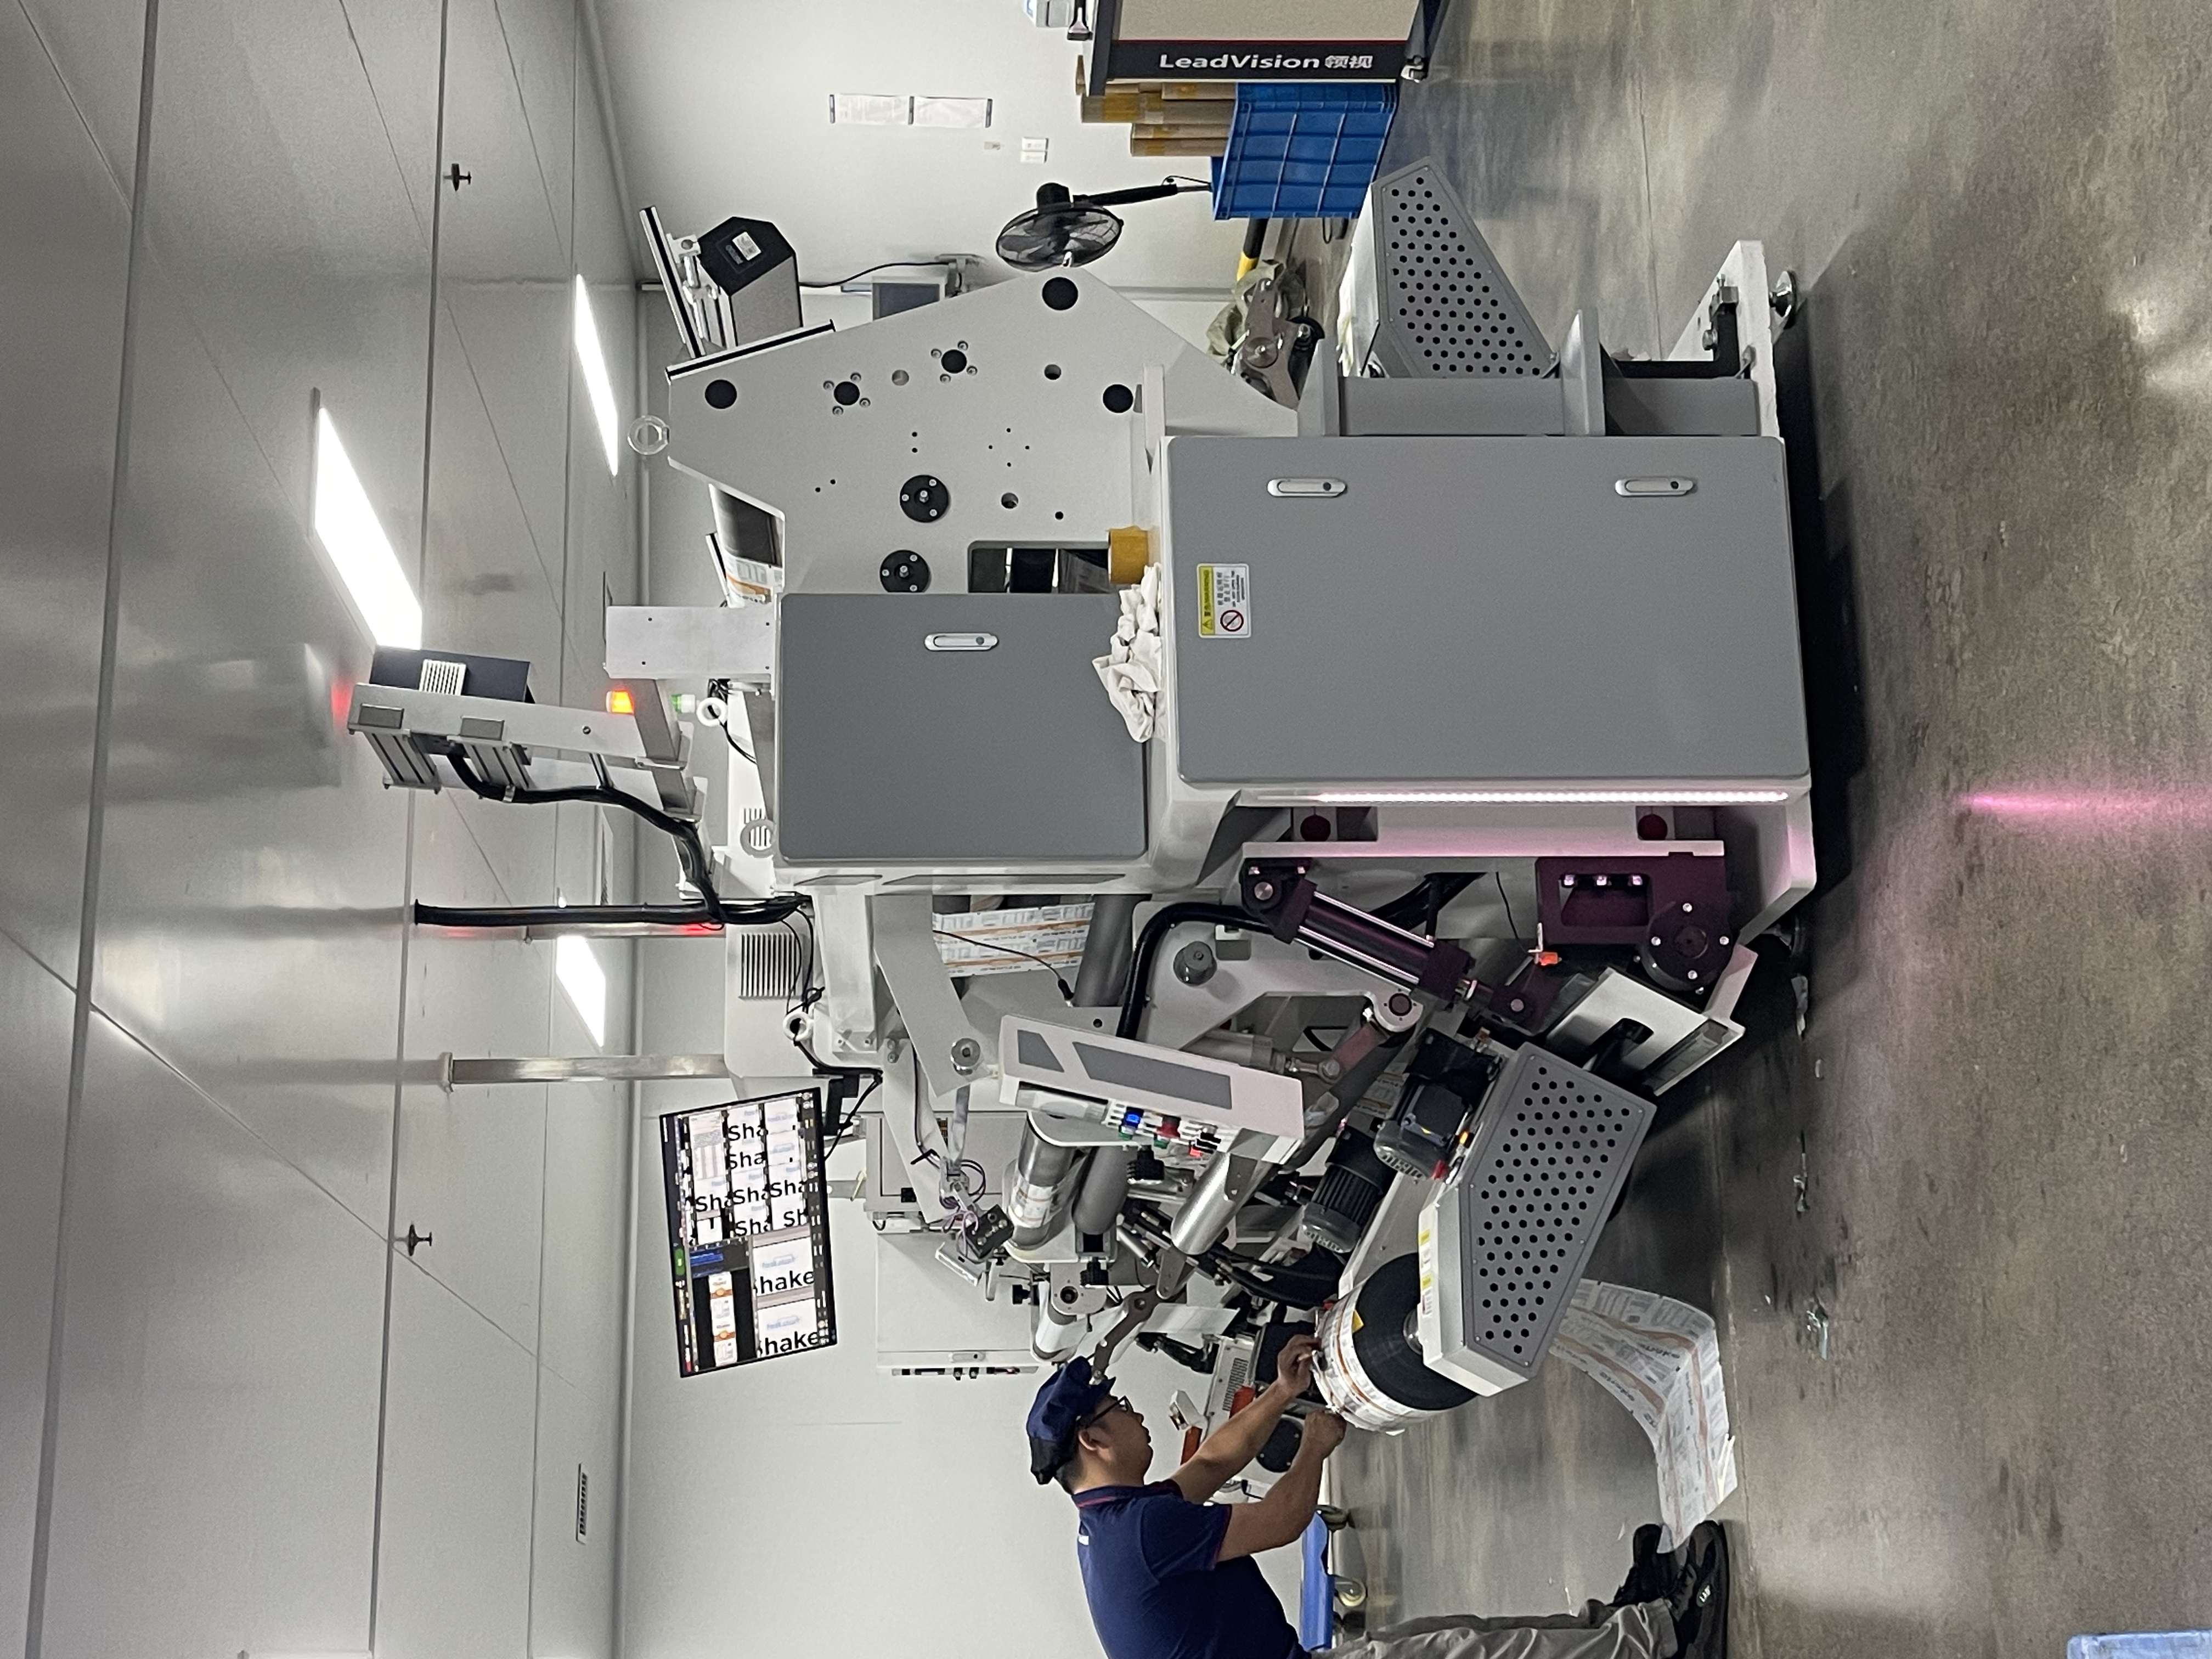
Packaging manufacturers commonly look for:
Print registration
Color variation
Missing or incomplete print
Streaks and unwanted marks
Smudging
Visible film defects
Artwork alignment
I want to be exact about what that list is. It describes what manufacturers commonly check on printed film. It is not the BioPouches internal inspection checklist, which I was not given, and I am not claiming a 100% inspection rate, automatic defect detection or numeric tolerances. What I can say is that inspection happens at the printed-film stage, right after printing, and that printed and laminated film is inspected again later in the workflow. Checking at the roll stage is the sensible place to catch a print problem, because a defect found on a roll is far easier to deal with than one found in finished pouches.
Common Flexible Packaging Printing Defects and Their Causes
Diagnosing a print defect depends on the printing method, the ink, the substrate and the condition of the equipment. The causes below are typical possibilities, not a diagnosis of any specific job.
| Defect | Typical possible causes | Why it matters | Common preventive or corrective considerations |
|---|---|---|---|
| Misregistration | Film tension variation, film stretch, inaccurate cylinder or plate mounting, registration control drifting | Blurred images, colored edges, small text that is hard to read | Tension control, careful mounting, monitoring registration marks during the run |
| Color variation | Ink viscosity changes, inconsistent ink mixing, press conditions, differences between film batches | Brand color looks different from bag to bag or run to run | Approved color references, ink viscosity control, consistent film, comparison against an approval sample |
| Streaking | Doctor blade problems or cylinder scratches on gravure, dried ink, contamination in the ink | Lines across the print that spoil solid areas and graphics | Blade checks and replacement, cylinder cleaning, ink filtering |
| Smudging | Ink not fully dry before winding, too much ink applied, line speed too fast for the drying | Damaged artwork and marks transferred between layers of the roll | Drying adjustment, ink amount control, matching speed to the job |
| Poor ink adhesion | Film surface not suited to the ink, incompatible ink and film, surface contamination, incomplete drying | Ink rubs off or flakes, and lamination bonds can be affected | Checking film surface treatment, confirming ink and film compatibility, adhesion testing |
| Missing print | Clogged cylinder cells or damaged plates, dust or debris on the film, ink starvation | Incomplete graphics, gaps in solid colors, text that drops out | Keeping cylinders, plates and film clean, watching the printed film during the run |
What Packaging Buyers Should Prepare Before Printing
The more of this you have ready, the faster a printing method and a specification can be settled:
Packaging dimensions and pouch format. Size and format decide how much printable area you have and where seals, zippers and valves will fall.
Material and barrier requirements. What the product needs from the film affects the structure the artwork is printed on.
Print-ready artwork. Artwork prepared to the pouch dimensions, with vector graphics where possible.
Brand colors and color references. Pantone numbers or physical references for colors that must match.
Order quantity. Quantity is the biggest factor in which printing method makes sense.
Number of designs or SKUs. Several flavors or sizes change the economics.
Surface finish requirements. Whether you want a matte or glossy look, for example.
Proof and sample approval. Who approves what, and at which stage.
Intended product and filling conditions. What goes in the pouch, and how it will be filled and sealed.
You can browse the BioPouches product range to choose a format. Coffee roasters in particular often ask about custom artwork, short-run packaging and degassing-valve pouches, and those questions are covered on our coffee packaging page.
Frequently Asked Questions
What printing methods does BioPouches offer?
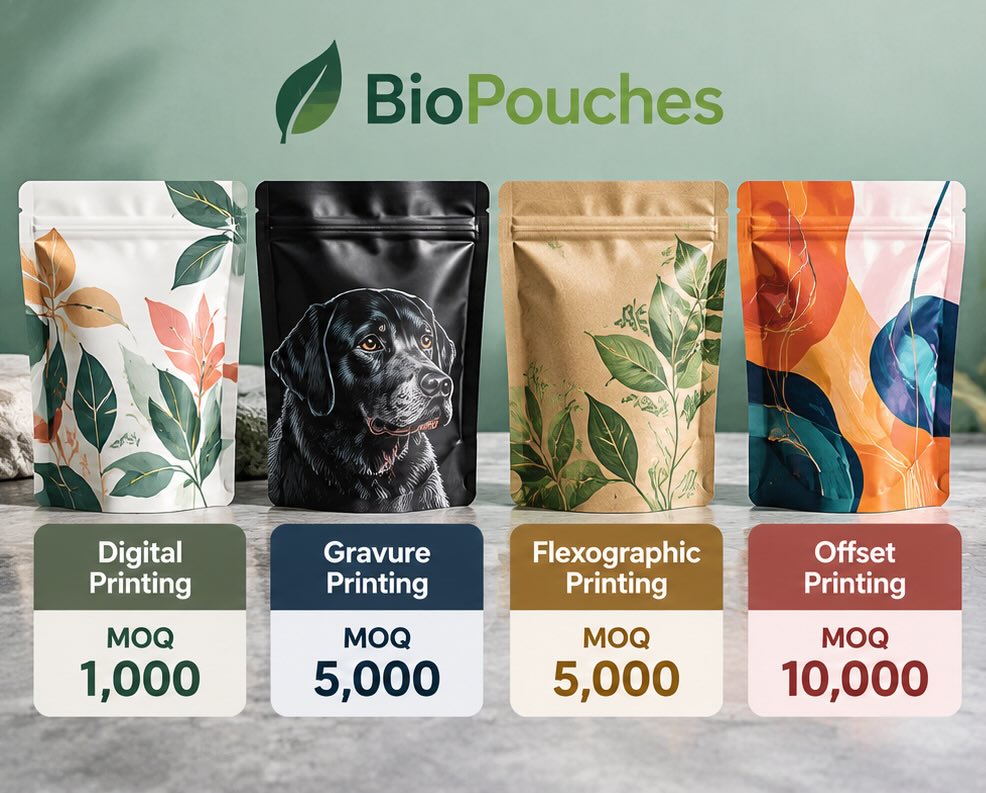
BioPouches offers gravure, digital and flexographic printing. Which one suits a project depends on quantity, artwork, material and specifications.
How many colors can BioPouches print on flexible packaging?
BioPouches has printing equipment covering 1 to 10 colors, and a 10-color gravure press was observed at the factory. The number of colors available on a given project depends on the printing method and the artwork.
What is the difference between gravure and digital printing?
Gravure prints from engraved cylinders, one for each color, which suits repeat designs and larger runs but adds preparation before the first pouch. Digital prints directly from a digital file without conventional cylinders or plates, which suits shorter runs and frequent design changes. Cost and suitability depend on quantity, artwork and material.
Does BioPouches offer soy-based printing inks?
Yes, soy-based inks are among BioPouches' ink options, though not every order uses them. Soy-based ink does not by itself make a pouch biodegradable, recyclable or food-safe, so ink suitability is evaluated for the full structure and application.
How is printed packaging film inspected?
Printed film is inspected after printing, on rolls, and printed and laminated film is inspected again later in the workflow. Manufacturers commonly check registration, color variation, missing print, streaks, smudging, visible defects and artwork alignment. BioPouches' exact checklist and tolerances are not published here.
Explore the BioPouches Factory
Printing is one stage in a longer production journey. After printing, film moves to lamination when the structure requires it, then to converting equipment that folds, seals and cuts it into pouches. Depending on the product, degassing valves are installed or zipper-related sealing operations are carried out, and finished pouches are inspected, packed and prepared in shipping cartons.
For a wider look at those stages, the gallery has real photographs of our flexible packaging production equipment and the working areas around it, all taken at the factory.
If you are planning custom printed packaging, contact BioPouches with your product, your expected quantity and where your artwork stands, and we will help you work out the right printing method. BioPouches is led by company owner and CEO Peter Zhu, and Flora Tian and Sonnie Yan of our sales team are available to discuss your packaging requirements.
Flexible Packaging Expert at BioPouches
Asad Manan has over 6 years of hands-on experience in flexible packaging at BioPouches. He specializes in beauty product, Coffee, Food-Snacks, and health products packaging solutions that protect sensitive formulas and extend shelf life. With strong content writing skills, he creates practical guides to help brands choose the right packaging for stability, hygiene, and sustainability.
Latest News